Project introduction
This overview describes a cropped granny square top with short flutter sleeves and a small collar, not the full row by row tutorial. For complete instructions, follow the Original designer’s pattern and instructions. The design adds coverage and a relaxed 1970s feel, using sunburst squares in chocolate, caramel, and cream with a striped band at the lower edge.
Each motif is small enough to finish in a sitting, so the project grows as a pile of squares before joining begins. Sleeve panels and the waistband come last, which keeps early stages portable. The finished shape pairs well with high waisted jeans.
Materials
Gather the supplies below before starting, since the source lists only these four essentials. No yarn weight, fiber, hook size, or amount is specified, so choose a yarn and a matching hook that give a fabric you like for a summer top.
- Yarn in four colors of your choice
- Crochet hook suitable for your yarn
- Scissors
- Tapestry needle
Stitches Used to Create This Design
The design centers on the crochet granny stitch, which gives the squares their airy, clustered texture. That stitch family keeps the fabric open yet sturdy enough to join into panels. Comfort with clusters and chain spaces covers the main skill this top asks for.
Granny Square Pattern Overview
This section maps the four round motif at a high level, so you can see how the square takes shape before opening the full pattern. A dense center leads to taller, open rounds, then clustered texture, and finally a round that squares the edges.
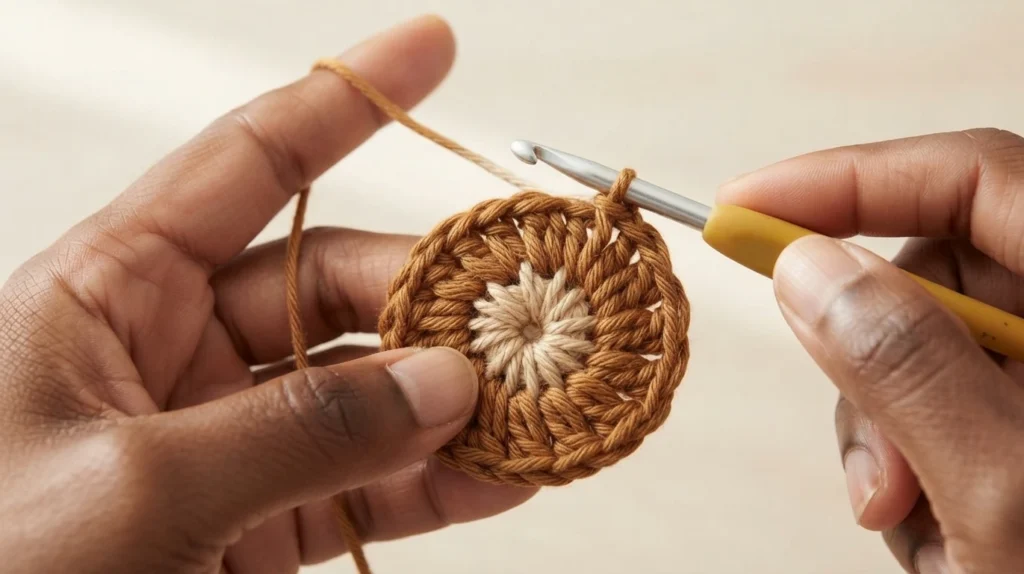
Round 1 The Center
The motif starts from a closed center that sets spacing for later rounds. The source forms this center with a magic ring and a starting chain that stands in for the first double crochet. Fifteen more double crochets fill the ring, for 16 stitches in total, then the ring closes with a join.
Round 2 The Spindles
The second round adds height and openness with a color change and tall stitches around the center. The source begins with a slip knot join and a chain of 6, then works a triple crochet plus a chain 2 pairing in each stitch around. That pairing leaves even spaces for the next round.
Round 3 The Clusters
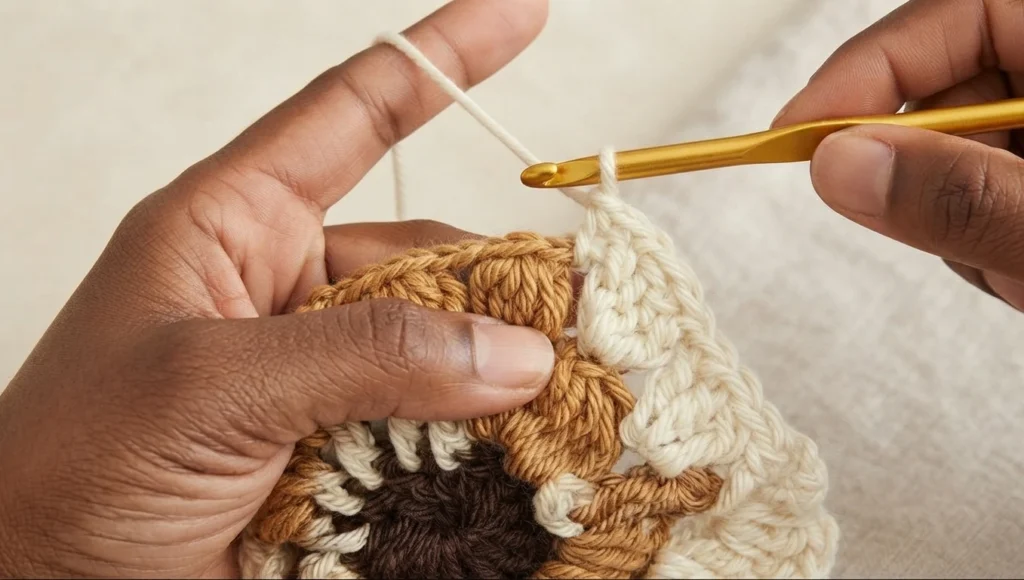
The third round adds texture by working clusters into the spaces left by the previous round. A new color joins in a chain space, and the source builds each cluster from a starting chain plus four double crochets worked together. Chain 2 spaces separate the clusters around the motif.
Round 4 Squaring Off
The final round turns the round motif into a square with clear corners and straight sides. The source attaches the last color in a chain space, then forms each corner from two groups of three double crochets separated by a chain 2 space. Three double crochets fill each side space.
Stitch and Round Clarity
Each round plays a distinct role in shaping the block. The first round gives a dense, stable anchor, so careful counting there supports later spacing. The second round adds height and air. The third round fills spaces with clusters, and the fourth defines corners and evens edges for joining.
Assembly
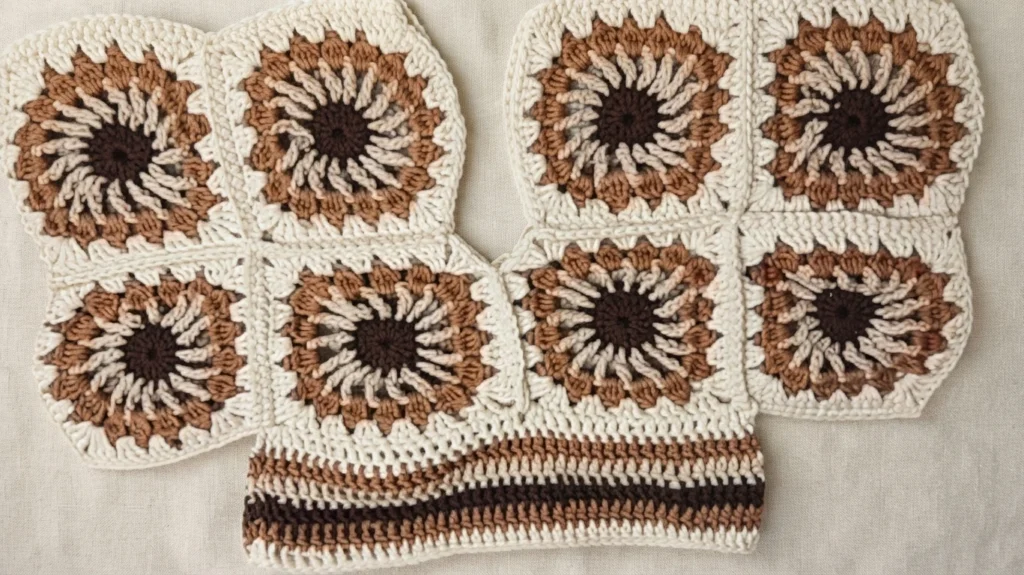
Assembly turns finished squares into a wearable top in three broad moves: joining squares into panels, shaping sleeves and body, and adding the waistband. Working in that order keeps pieces flat and measurable for as long as possible before shaping.
Layout and Joining
The top uses 16 squares in total, split into two panels of 8 squares each. Each panel follows a 4 by 2 arrangement, which gives a rectangular piece that is easy to check against the body. The source joins squares with single crochet along the long edges with right sides facing.
Forming the Sleeves and Body
Once panels are joined, each panel folds in half to form its sleeve shape. The source sews a length equal to one square on each side, which leaves openings that stay relaxed rather than snug. The two panels then join at the center for the front, and the same joining is repeated for the back.
Waistband
The waistband is worked around the lower opening after the body is formed. Yarn joins at the bottom edge, and double crochet stitches are worked evenly around the full opening. Extra rows can be added when a longer finish is wanted, without changing the squares.
How the Garment Construction Works
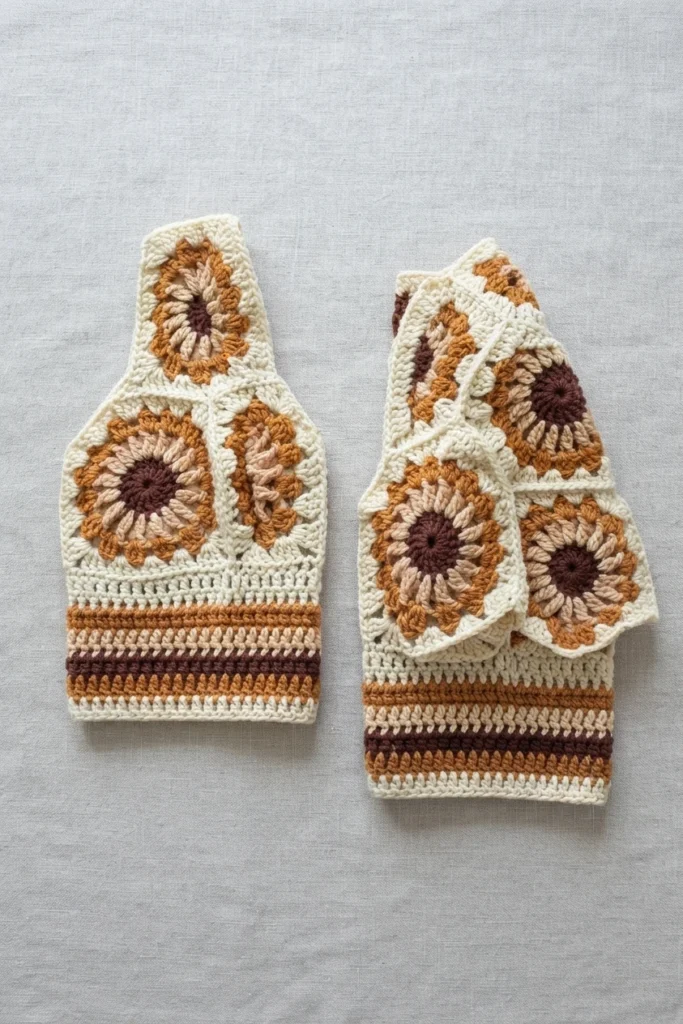
The garment is built from two matching rectangular panels, which keeps measuring simple before shaping begins. Joining squares into flat panels first gives stable pieces that can be compared. Folding each panel in half creates the arm openings, and joining panels at the center gives a balanced front and back.
The waistband comes last, so length and drape can be settled after the body is complete. Adding rows here helps the top hang straight rather than flare outward. That order lets the maker check fit and decide how much extra length the cropped shape needs.
Fit and Sizing Guidance
The finished shape is relaxed and boxy, with ease through the body rather than a close fit. For extra width, the source favors lengthening the panel with more squares instead of pulling stitch tension tighter. For a different length, the source favors changing waistband rows instead of resizing squares. Before final joins, check panels against the body or a similar top for sleeve depth and length.
Beginner Notes
Newer makers benefit from slow, careful counting during the opening two rounds of every square. A small miscount early can lead to twisting or edges that do not line up later. Lightly blocking squares before joining helps panels sit neatly and makes seams easier to work, especially with several colors.
Troubleshooting
Small fixes can resolve common issues. If squares curl, the source points to tension in Round 2 and to keeping chain stitches from being pulled too tight. If panels feel stiff, the source suggests a slightly larger hook for joining. If the neckline feels tight, adjust the center join before sewing the full seam.
Finishing
Finishing gives the top a clean look when worn. The source calls for weaving in all loose ends neatly and blocking lightly if needed to smooth the shape. A light block lets stitches relax and panels settle without flattening the square structure. The pattern is listed as free on the CrochetMine website, with no claim here about any printable or PDF format.
Halloween Granny Square Cardigan Pattern Overview: All Eyes On You Cardi: Pattern Overview