Project introduction
This is a pattern overview, not a full tutorial. It explains what Divya’s amigurumi elephant design includes and how the pieces fit together, so you can decide if it belongs on your hook. For the complete instructions, the designer’s own pattern page remains the place to follow along.
Amigurumi elephant - Crochet Pattern Overview

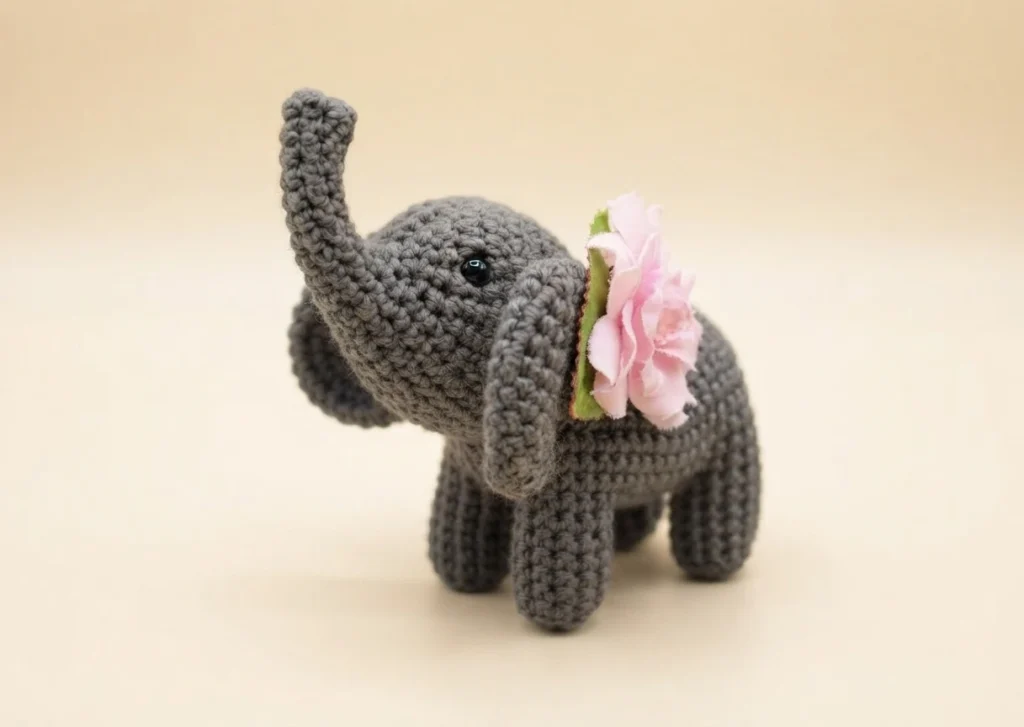
Divya of hellostitches xo first made an amigurumi elephant years ago and later edited and updated the instructions, publishing them as a free pattern on her website. The toy is palm-sized and stands on four legs in a size that fits your hand, and because the legs and body are worked as one piece, very little sewing is needed. Read the complete instructions on the Original designer’s pattern and instructions.
Since the elephant is small, it works up quickly and uses only a modest amount of yarn, which makes it a lovely quick gift or a satisfying weekend make. An ad-free copy can be purchased from the designer’s Ravelry shop for those who prefer a printable version, while the web version remains free to read.
If small amigurumi animals are your favorite makes, you may also enjoy our other PatternCrochet overviews for your next project, including Dinosaur Amigurumi: Pattern Overview and Dragon Amigurumi Pattern - - Ami Amour: Pattern Overview, both written in the same summary style.
Items you’ll need
The materials list is short, which suits a project this small. The designer lists gray 8 ply acrylic yarn but notes that any yarn of your choice will work, so you can match your stash or your favorite gray. Gather everything before the first round so the little pieces flow without interruption.
- Gray 8 ply acrylic yarn (the designer notes any yarn of your choice is also acceptable)
- 2.25mm crochet hook (her older beginner notes reference a 2.5mm hook)
- Stitch markers
- Tapestry needle
Abbreviations
The pattern uses a small set of standard abbreviations, and a short glossary helps the shaping rounds read clearly. If the invisible decrease looks daunting, the designer says a plain decrease is a fine substitute, though it may leave small bumps.
| Abbreviation | Meaning |
|---|---|
| ch | Chain, the basic loop used for starting chains and the small links between joined legs. |
| sl st | Slip stitch, a flat stitch the older trunk variant uses in one shaping round. |
| sc | Single crochet, the stitch the whole toy is built from. |
| inc | Increase, made by working two single crochet into the same stitch. |
| dec | Decrease, made by combining two stitches into one single crochet. |
| invdec | Invisible decrease: work the front loop of the first stitch and then the front loop of the second, yarn over and pull through both loops, then yarn over and pull through the remaining two loops. A plain decrease works too if you accept small bumps. |
| [stitch] * ‘n’ times | Repeat notation: work the stitches inside the brackets the stated number of times. |
Elephant amigurumi - Pattern Overview

The updated pattern is rated intermediate and finishes at a palm-sized scale, small enough to rest in your hand yet detailed enough to read clearly as an elephant. It suits a crocheter who is comfortable working in continuous rounds, shaping with increases and decreases, and joining pieces as they go. Expect four standing legs, a shaped head with trunk, a rounded body, and two perky ears.
Legs


Each leg starts with a magic circle and is worked in continuous rounds, with one round placed through the back loops only before the sides rise in plain single crochet. You will make four legs. The clever part comes after the fourth one: the yarn is not cut, and the same strand carries straight into the body, joining the four legs together, which is why this pattern asks for so little sewing.
Body


The body begins at the fourth leg, joining all four legs with short chains worked between them, then continues in rounds around the full set. The designer suggests stuffing the legs now, while the opening is still easy to reach. The upper body then tapers through decrease rounds toward the top, and a separate bottom half is closed with alternating single crochet and decrease repeats until the underside is shut.
Head

The head starts from a magic circle with 8 single crochet and grows outward in rounds. Increase rounds widen the piece while plain rounds between them keep the shaping smooth, forming the rounded skull and cheeks. Decreases near the end narrow the form, leaving a finished head ready to stuff and join to the body.
Ears


The ears begin with a small magic circle and widen through increase rounds before finishing with a plain round, giving a soft fan shape that reads instantly as an elephant ear. You will make two. The designer adds a warm personal note here, calling this a free beginner pattern from six years ago and sharing that she has wanted to make elephants since she started crocheting cute animals, though she feels this version is still not quite perfect.
Starting with the elephants trunk and then proceeding to it’s head,
This is where the older beginner variant begins. The trunk starts from a magic circle and stays narrow for the first several rounds, then widens through increase rounds as the work flows upward into the head. One shaping round mixes slip stitches with single crochet, and gentle decrease rounds refine the form near the end. When finished, the trunk and head stand as one piece, ready to join the body.
Elephant’s body is worked from the tail part to it’s neck
In the older variant the body is built as a separate piece, worked from the tail end toward the neck. It opens with a magic circle and increases round by round to a widest point of 42 stitches, then holds steady through several even rounds. Decrease rounds taper the form back down toward the neck, leaving a smooth stuffed oval that is sewn to the head and legs.
Make four of these elephants legs,

The older variant makes its four legs as separate pieces rather than joining them on the hook. Each leg starts with a magic circle, grows to 12 stitches, works one round through the back loops only, and continues in even rounds. Once all the pieces are complete, they are sewn together and the tiny elephant is finished.
Ears


The older variant’s ears start with a magic circle and grow through increase rounds to 24 stitches, followed by several even rounds that keep the fan shape flat and neat. The designer notes that she sewed in only the ends of the ears, fastening them lightly so they could flap from front to back. The join looked a little cinched, she says, but pretty from her chosen angle.