Project introduction
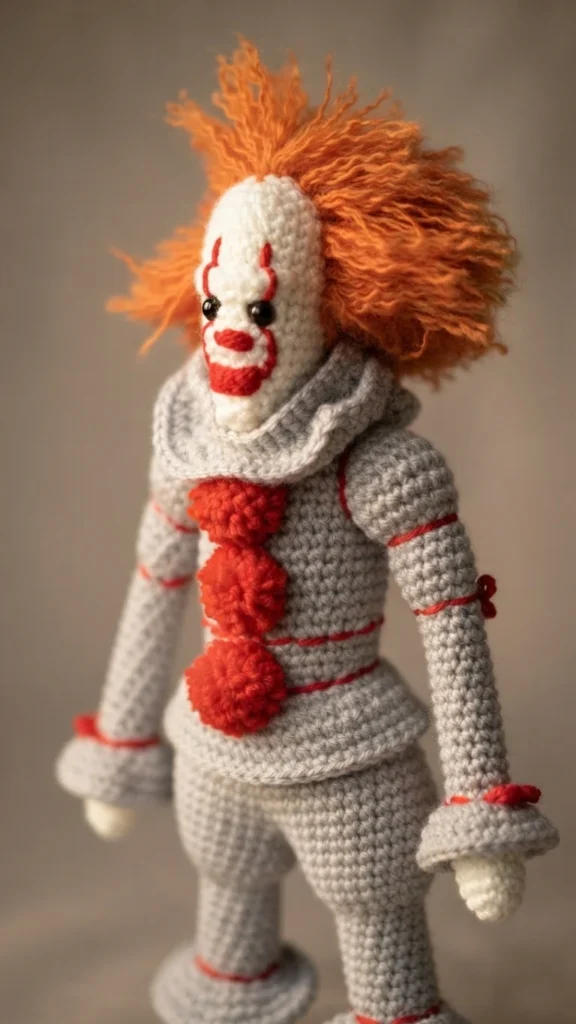
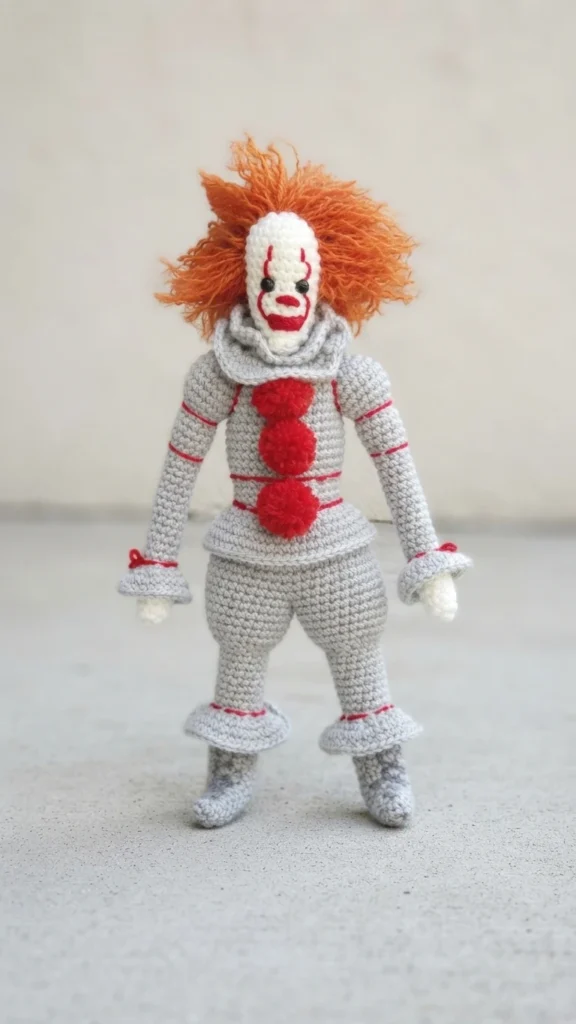
This amigurumi figure is the updated Pennywise the Dancing Clown, made by the designer behind Mad Hooker for a Norbert calendar. The maker had read Stephen King’s It more than once and counts it among their favorite books, so the character was a natural choice for the next calendar entry. The goal was a doll that stayed mostly basic without losing too much of the character’s detail, though the designer notes it is still a bit more complicated than some of their other figures.
Material choices were deliberately narrow. The maker decided to use nothing beyond yarn and basic safety eyes, a decision tied to a promise not to buy more yarn or supplies until the existing stash was used up. That constraint shaped the finished look rather than limiting it.
The doll measures about 14 inches tall without the hair included. Light gray yarn was used for the suit because no closer silver shade was on hand, and the designer now wishes an off white had been used for the neck ruffles instead. This overview describes the general construction approach and the material notes the designer shared. It is not a substitute for the row by row instructions. Anyone making the figure should work from the original source for exact stitch counts and assembly details.
Pattern format and preparation
The supply list is short and the pattern is written in a compact, rounds based shorthand. The designer lists worsted weight yarn in colors of choice, a G size hook, 9mm safety eyes, and Poly-fil. The 9mm figure belongs with the safety eyes, not the hook, so treat those as two separate items when gathering supplies. Beyond the yarn and eyes, the maker intentionally avoided extra notions.
- Worsted weight yarn in colors of choice
- G size hook
- 9mm safety eyes
- Poly-fil stuffing
Construction is modular. Legs, body, head, arms, and facial details are worked in sequence, with the body growing out of the joined legs and the head made separately before being sewn on. Ruffles are added afterward by working into front loops that were left unworked at the waist, shoulders, and neck. Working in a spiral without joining rounds is the norm for most of the piece, and the designer flags the few places where that changes.
The legs are made in light gray, two of them, beginning with a magic circle. The foot is shaped with single crochet, increases, and decreases, and half double crochets appear in specific sections. Stuffing goes in as the leg grows. The shoe is then formed by attaching yarn to the front loops left unworked on the leg and working in a spiral, which separates the shoe from the leg shaft.
The legs are joined by holding them together and slip stitching through both legs five times in the middle where they meet, working from the front of the legs to the back. The designer notes that the two legs were angled slightly differently to match the reference picture being duplicated. After the join, work continues around the legs, and the designer reports ending with 5 slip stitches and 46 single crochets. From that point the body forgoes the slip stitch and works only in single crochet.
The body continues in light gray with shaping for the waist, shoulders, and neck. Back loop only rounds at the waist, shoulders, and neck create the openings that the ruffles later attach to. The head is worked separately in white, starting from a magic circle and increasing into a sphere. Safety eyes go in between rounds 8 and 9, counting the 6 single crochets in the magic circle as round 1, with two stitches between them. The final increases are positioned to face outward as the forehead.
The head is stuffed, closed, and sewn to the body with the chin held down against the ruffles.
Facial features are stitched directly onto the head. The nose is three horizontal stitches placed two rounds below the eyes and two stitches apart. The mouth sits two rounds below the nose, three stitches apart, and uses five horizontal stitches with one vertical stitch in the middle to bring the lips together. Lines up the face are simple running stitch. Eyebrows are worked in white from a chain of nine, using the back ridges if that feels comfortable, or plain single crochet if not, then sewn above the eyes.
The arms are made in white and gray. They start in white, switch to gray, and are worked with back loop only at the transition. The designer advises stuffing the arm lightly and the hand area a bit more firmly. Ruffles are finished on the arms and sewn to the sides of the body directly under the shoulder ruffle. Red yarn is then used to stitch lines above the ruffles, twice on the arms and around the shoulders, and the designer also added small bows above the ruffles.
Three small pom poms in red are attached to the front of the suit. The designer notes that the book describes orange pom poms but chose red to match the updated Pennywise. Pre made felt pom poms can be sewn on instead if they are on hand. For the hair, orange strands of yarn are hooked directly onto the head, then split and lightly finger brushed to build the textured look.
For crocheters who enjoy clown themed projects, two related overviews are worth a look: the Wobbly Clown pattern by Susan’s family: Pattern Overview and the Lil’ Penn the Kitty Clown pattern by StringsandThingsByJoyce: Pattern Overview. Each offers a different take on the classic clown motif.
The complete step by step instructions, including exact stitch counts and assembly details, live at the Original designer’s pattern and instructions. Working from that source is the reliable way to reproduce the figure accurately.