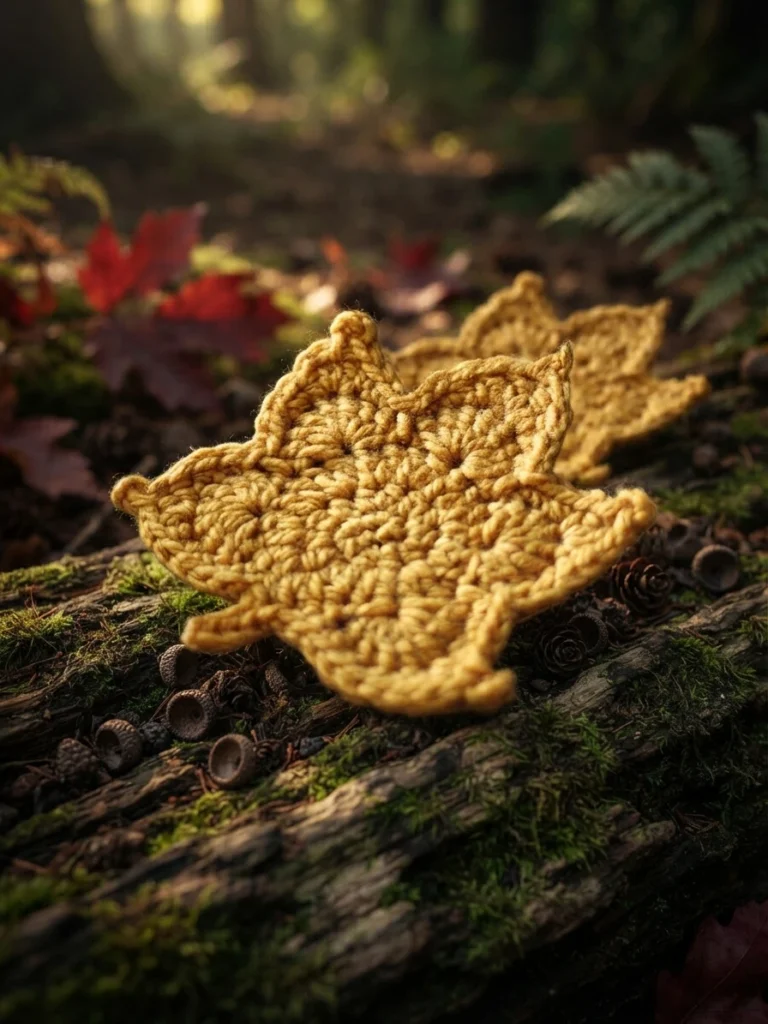
How to Crochet a Maple Leaf
This is an overview of the crochet maple leaf, its listed supplies, and the coaster finish. The leaf begins with continuous increasing rounds that create a rounded center. Groups of double crochet stitches worked into a stitch shape the scalloped areas, and stitches of different heights form the pointed outline.
The construction has several stages, so it helps to consider the center and the leaf edge separately. The pattern continues from its center into the scalloped shaping, then adds the stem and a finishing round with five points. The outline is not made from five identical repeats: the points use different stitch combinations. Use the linked instructions and video to follow their order.
Crochet Maple Leaf Written Pattern Overview
Pretty Darn Adorable provides the written pattern and video tutorial. Its page credits The Painted Hinge as the source of the original pattern and links to the original pattern on Ravelry. This overview describes the project without replacing either set of instructions.
The written pattern begins with two chains and works in continuous rounds. The source states totals of 12 stitches after round two and 24 after round three. Round four uses groups of seven double crochets to create scalloped sections, with skipped stitches and slip stitches between groups. The next stages form the stem and five points. Refer to the source instructions for the complete sequence and placement.
Skill Level
The source labels the project easy. It uses continuous rounds and a mix of stitch heights in the shaping, so review the abbreviations and the linked instructions before starting. A video tutorial is also available on Pretty Darn Adorable’s page for those who prefer to follow the project visually.
Abbreviation
The source lists these abbreviations for the pattern. The table separates the terms for easier reference.
| Abbreviation | Meaning |
|---|---|
| ch | Chain |
| dc | Double crochet |
| hdc | Half double crochet |
| tc | Triple crochet |
| sc | Single crochet |
| sk | Skip |
| st, sts | Stitch, stitches |
| sl st | Slip stitch |
| rpt | Repeat |
- Basic stitches include chain (ch), single crochet (sc), half double crochet (hdc), double crochet (dc), and triple crochet (tc).
- Action terms include skip (sk), slip stitch (sl st), and repeat (rpt).
- Counting terms include stitch (st) and stitches (sts).
Materials
The pattern page lists a 5.5 mm hook, tapestry needle, stitch markers, and #5 bulky yarn. The maker used leftover Bernat Softee Chunky and suggests Lions Pride Woolspun as a substitute. No yarn quantity or finished dimensions are given in the supplied source, so consult the linked pattern page if you need further project details.
- 5.5 mm crochet hook
- Tapestry needle
- Stitch markers
- #5 bulky yarn, such as the listed Bernat Softee Chunky, or the suggested Lions Pride Woolspun alternative
- For coaster backing: permanent fabric glue, felt, a marker, and scissors
Materials for Coasters
For the coaster finish, the source lists Speed Sew or another permanent fabric glue, craft felt for the bottom, a marker, and craft scissors. These are finishing supplies, separate from the hook and yarn needed to crochet the leaf. The source uses both “Speed Sew” and “Speed Stitch” when naming the adhesive, without clarifying whether they refer to the same product.
Crochet Maple Leaf Stem
The source makes the stem from a chain of four. Slip stitch into the second chain from the hook and each chain made, then into the last stitch of round four. Follow the pattern page for the complete construction sequence and placement as you work the leaf.
Finishing Round of Leaf
The finishing round shapes five points. Across those points, the pattern combines single, half double, double, and triple crochet stitches with chains and slip stitches. Some taller stitches help form the tips, while shorter stitches shape the edges between them. The point sequences differ, so follow their order in the original instructions rather than treating them as identical repeats. The source finishes by joining with a slip stitch and fastening off.
Finishing for coasters
The coaster finish uses a felt backing attached after the crochet leaf is complete. The materials and source-listed finishing method are described in the next section.
- Prepare your tools: Have your felt, marker, scissors, and permanent fabric glue ready before handling the completed leaf.
- Trace carefully: Place the leaf flat on the wrong side of the felt to ensure an accurate outline.
- Cut precisely: Cut inside the traced line to prevent the felt from peeking out around the edges.
- Dry fully: Allow the adhesive to cure completely according to the manufacturer’s instructions before using the coaster.
Materials for coasters
Place the completed crochet leaf on felt and trace around it with a permanent marker. Cut the felt about a quarter inch inside the traced outline. Glue the felt to the wrong side of the leaf, then let the adhesive dry according to the product directions. The source specifies this backing method and does not give additional coaster-finishing steps.
Keep the listed supplies together before starting: the crochet tools and yarn for making the leaf, plus felt and adhesive if you plan to use it as a coaster. For the full pattern sequence or video guidance, use the linked source pages.

3 thoughts on “Crochet Maple Leaf Pattern & Video: Pattern Overview”