Project introduction
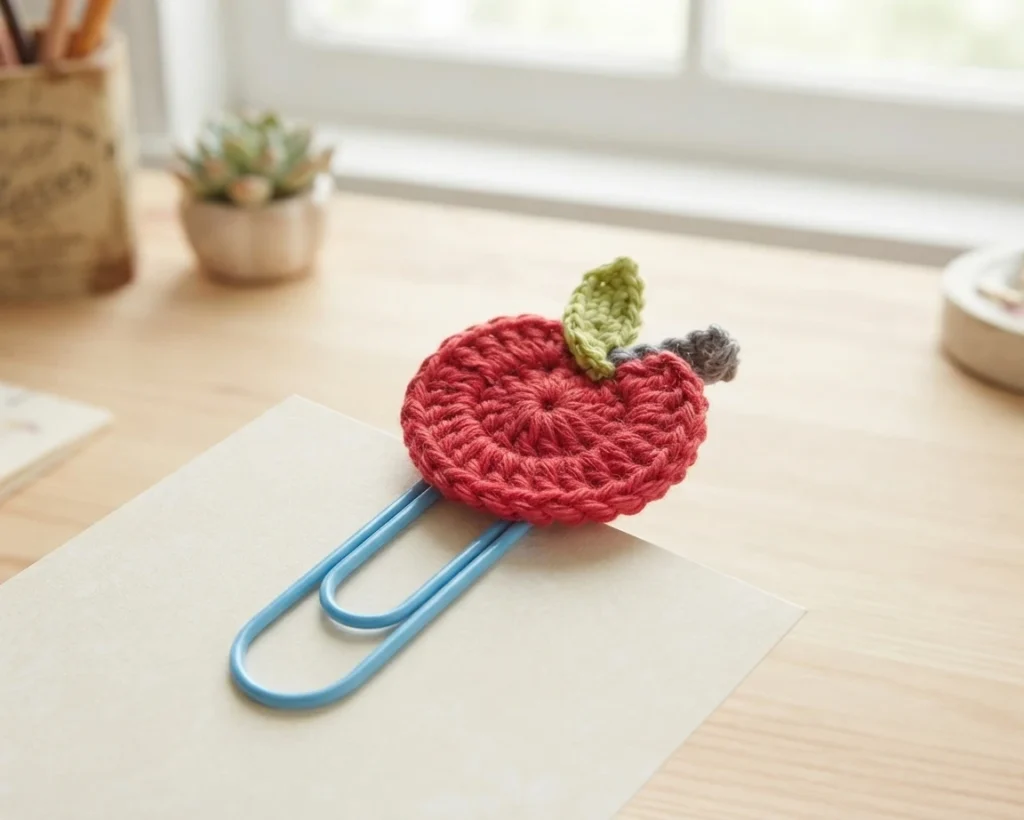
This is a pattern overview, not a full tutorial. The Apple Paperclip Tutorial comes from Annemarie’s Haakblog, a Dutch and English crochet blog, and it shows how a small crocheted apple is sewn onto a giant paperclip to cheer up a desk. The original post presents the apple, stem and leaf in both Dutch and English, so you can follow the designer’s own wording directly. For the complete row-by-row pattern, use the Original designer’s pattern and instructions.
The project is deliberately tiny and uses very little material. The source lists a giant paperclip, bought as a set at HEMA, and a little cotton suitable for a 4mm crochet hook, with Paintbox Yarns Cotton Aran given as an example. Once the apple is crocheted, it is simply sewn onto the paperclip. The blog notes that a magic ring tutorial is linked inside the pattern, and it offers an alternative start for anyone who finds the magic ring difficult.
If you enjoy small fruit motifs for desk accessories, the related overviews below are worth a look after you have read the designer’s original page. They cover other apple projects in the same spirit and can help you compare shapes, scales and finishing ideas before you choose your next make.
Pattern format and preparation
The source is written in Dutch and English, which makes it easy to check the original terms against the translation. The apple section begins with a magic ring, and the designer offers a fallback: work 2 chain stitches and continue with row 2, placing the 2 chain stitches and the 10 double crochet of row 2 into the second chain stitch made. The first 2 chain stitches do not count as a double crochet.
The apple then continues with repeats of 2 double crochet in the next stitch until 18 double crochet have been made, followed by a slip stitch and fastening off.
The stem and leaf are worked separately. The stem uses 5 chain, then 1 single crochet in the second chain from the hook and 3 slip stitches in the next three chain stitches before fastening off. The leaf uses 6 chain, then 1 single crochet in the second chain from the hook, followed by 1 half double crochet, 1 double crochet, 1 half double crochet and 1 single crochet in the next stitches. These are the source’s own construction notes, not a substitute for the full pattern.
Before you begin, gather the supplies the source lists so your apple and paperclip are ready to assemble in one sitting. The checklist below keeps every item from the original post in one place, including the hook size and the example yarn.
| Supply | Source detail |
|---|---|
| Giant paperclip | A set bought at HEMA |
| Cotton yarn | A little cotton suitable for a 4mm crochet hook |
| Example yarn | Paintbox Yarns Cotton Aran |
| Crochet hook | 4mm |
| Finishing | Sew the apple onto the paperclip |
Work the apple, stem and leaf as the designer describes, then position the apple on the paperclip and sew it in place. The source does not give a finished measurement or a yarn quantity beyond a little cotton, so treat those details as sample-specific and check the original page for the designer’s exact wording. If any instruction feels ambiguous, follow the original rather than guessing at a correction.